
Lead flashing at top of chimney shoulder
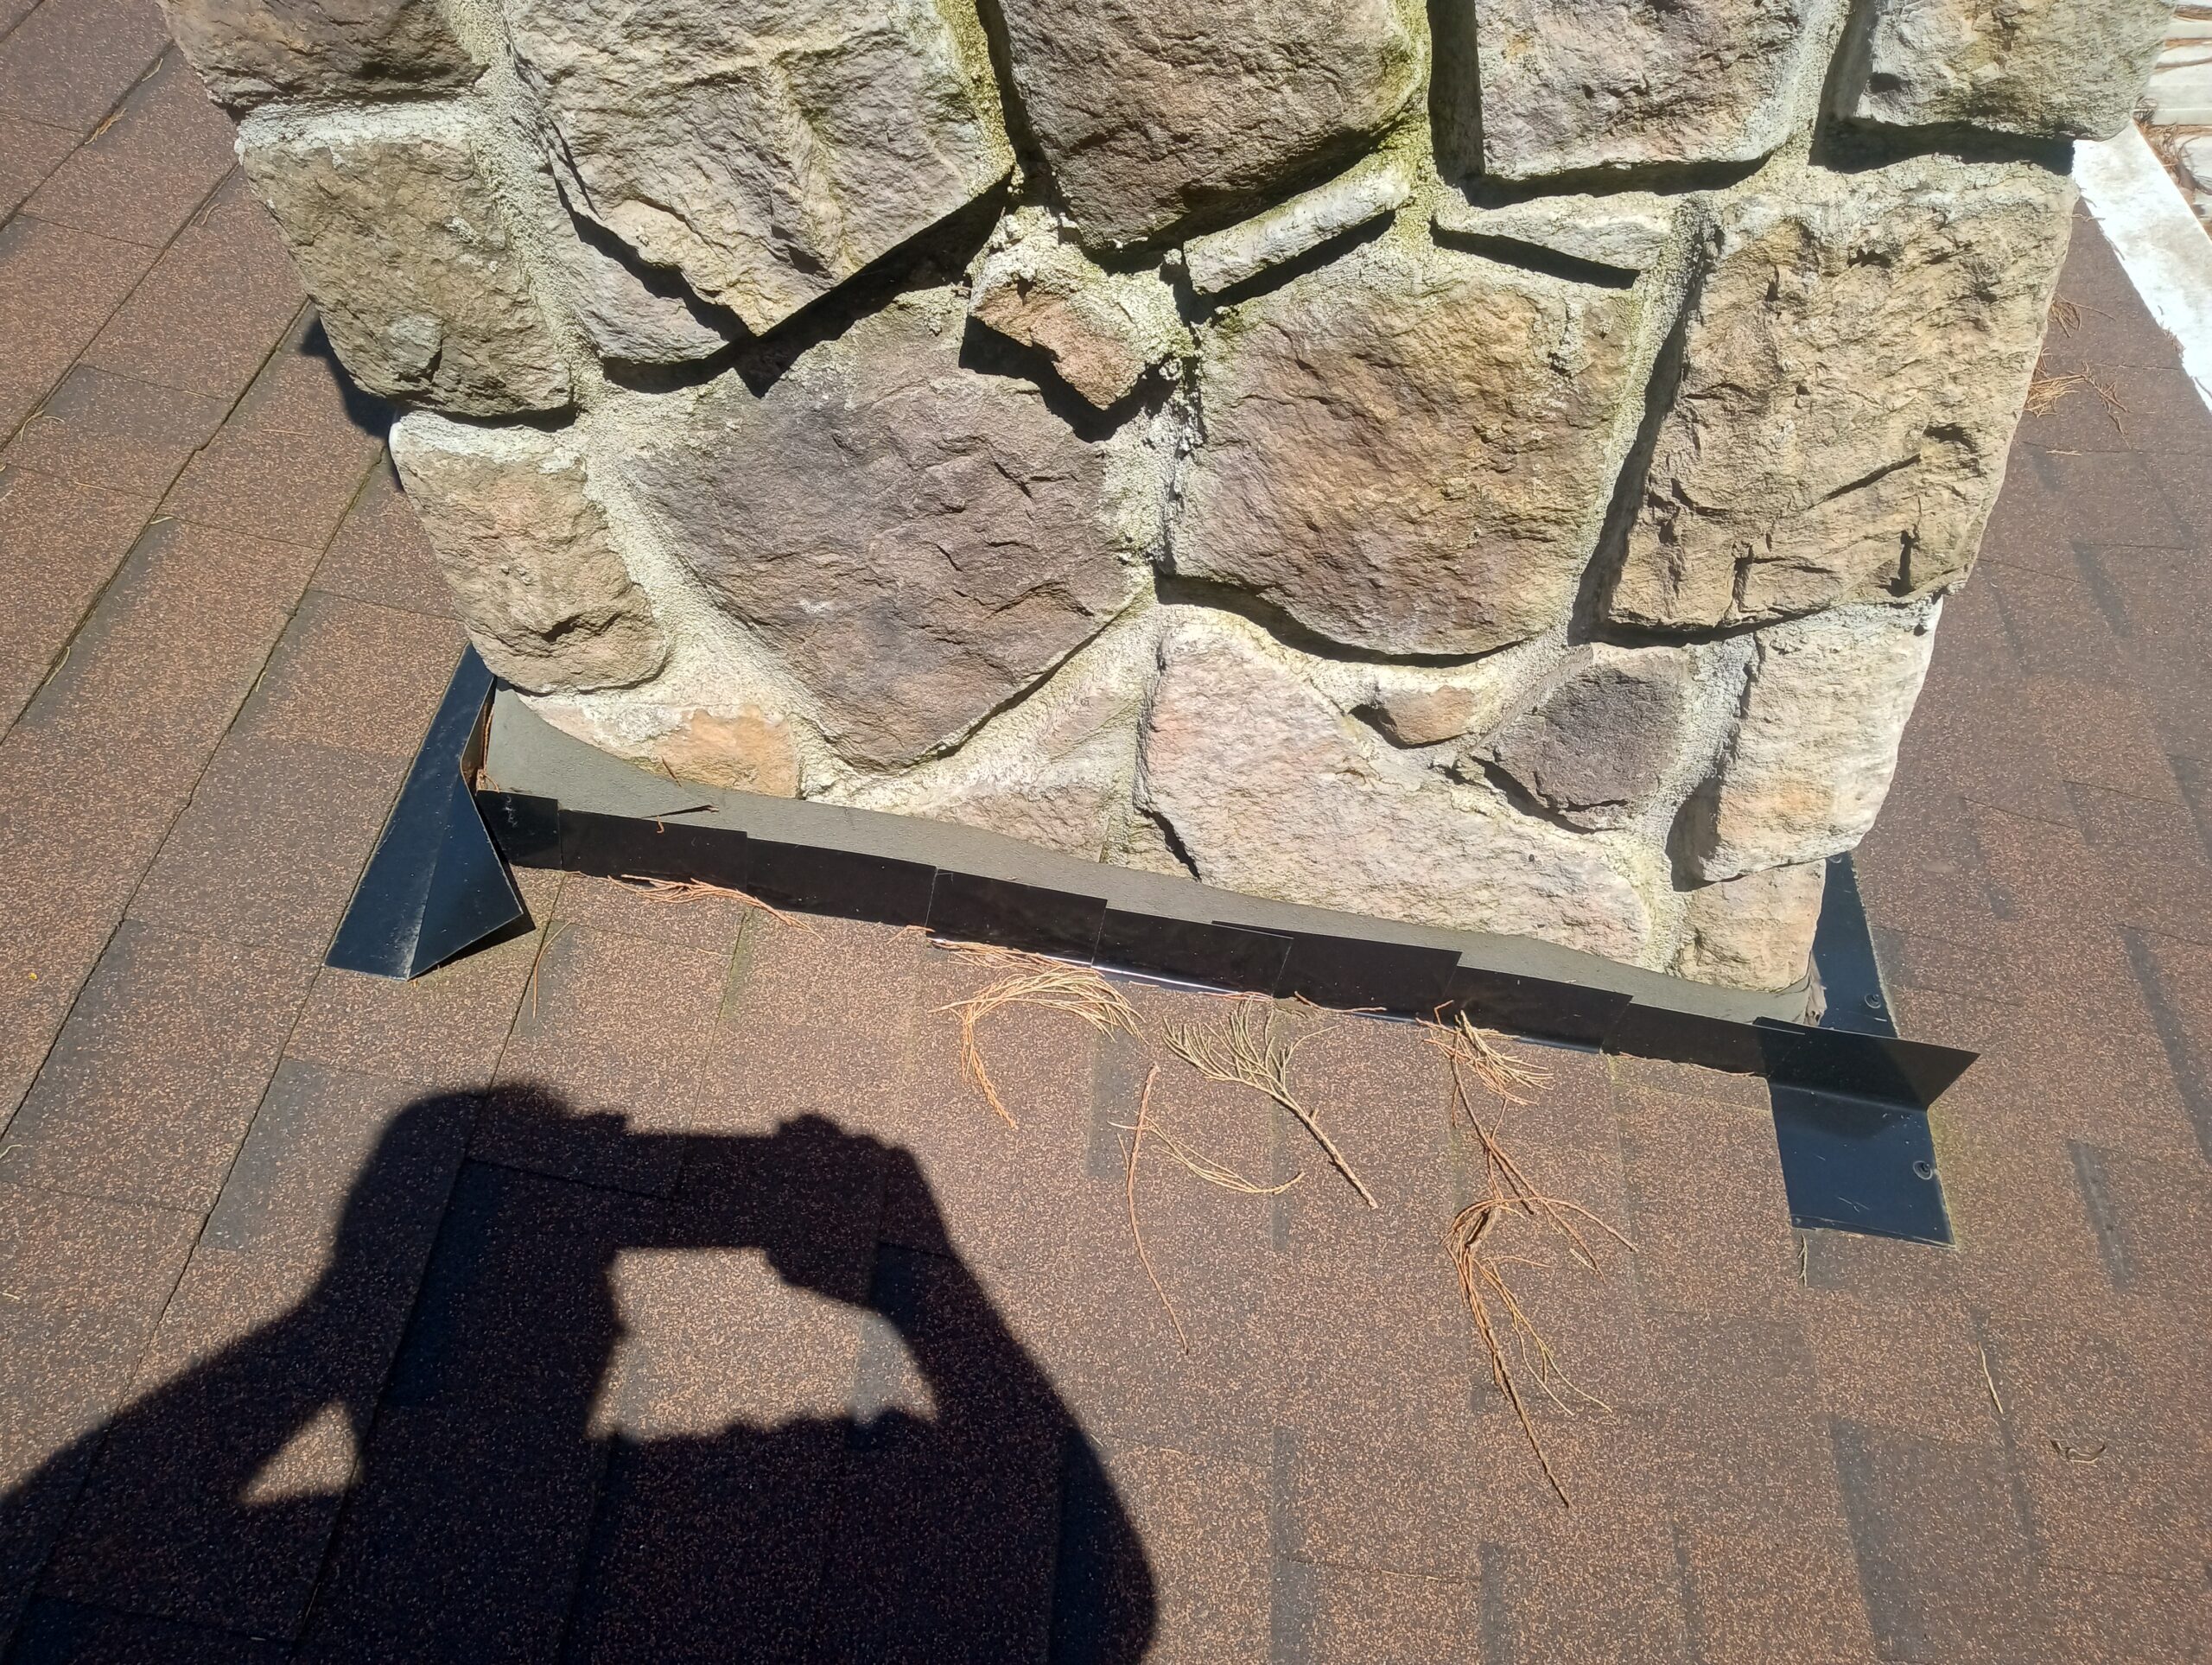
This chimney is missing the chimney flashing that would overlap the roof flashing.
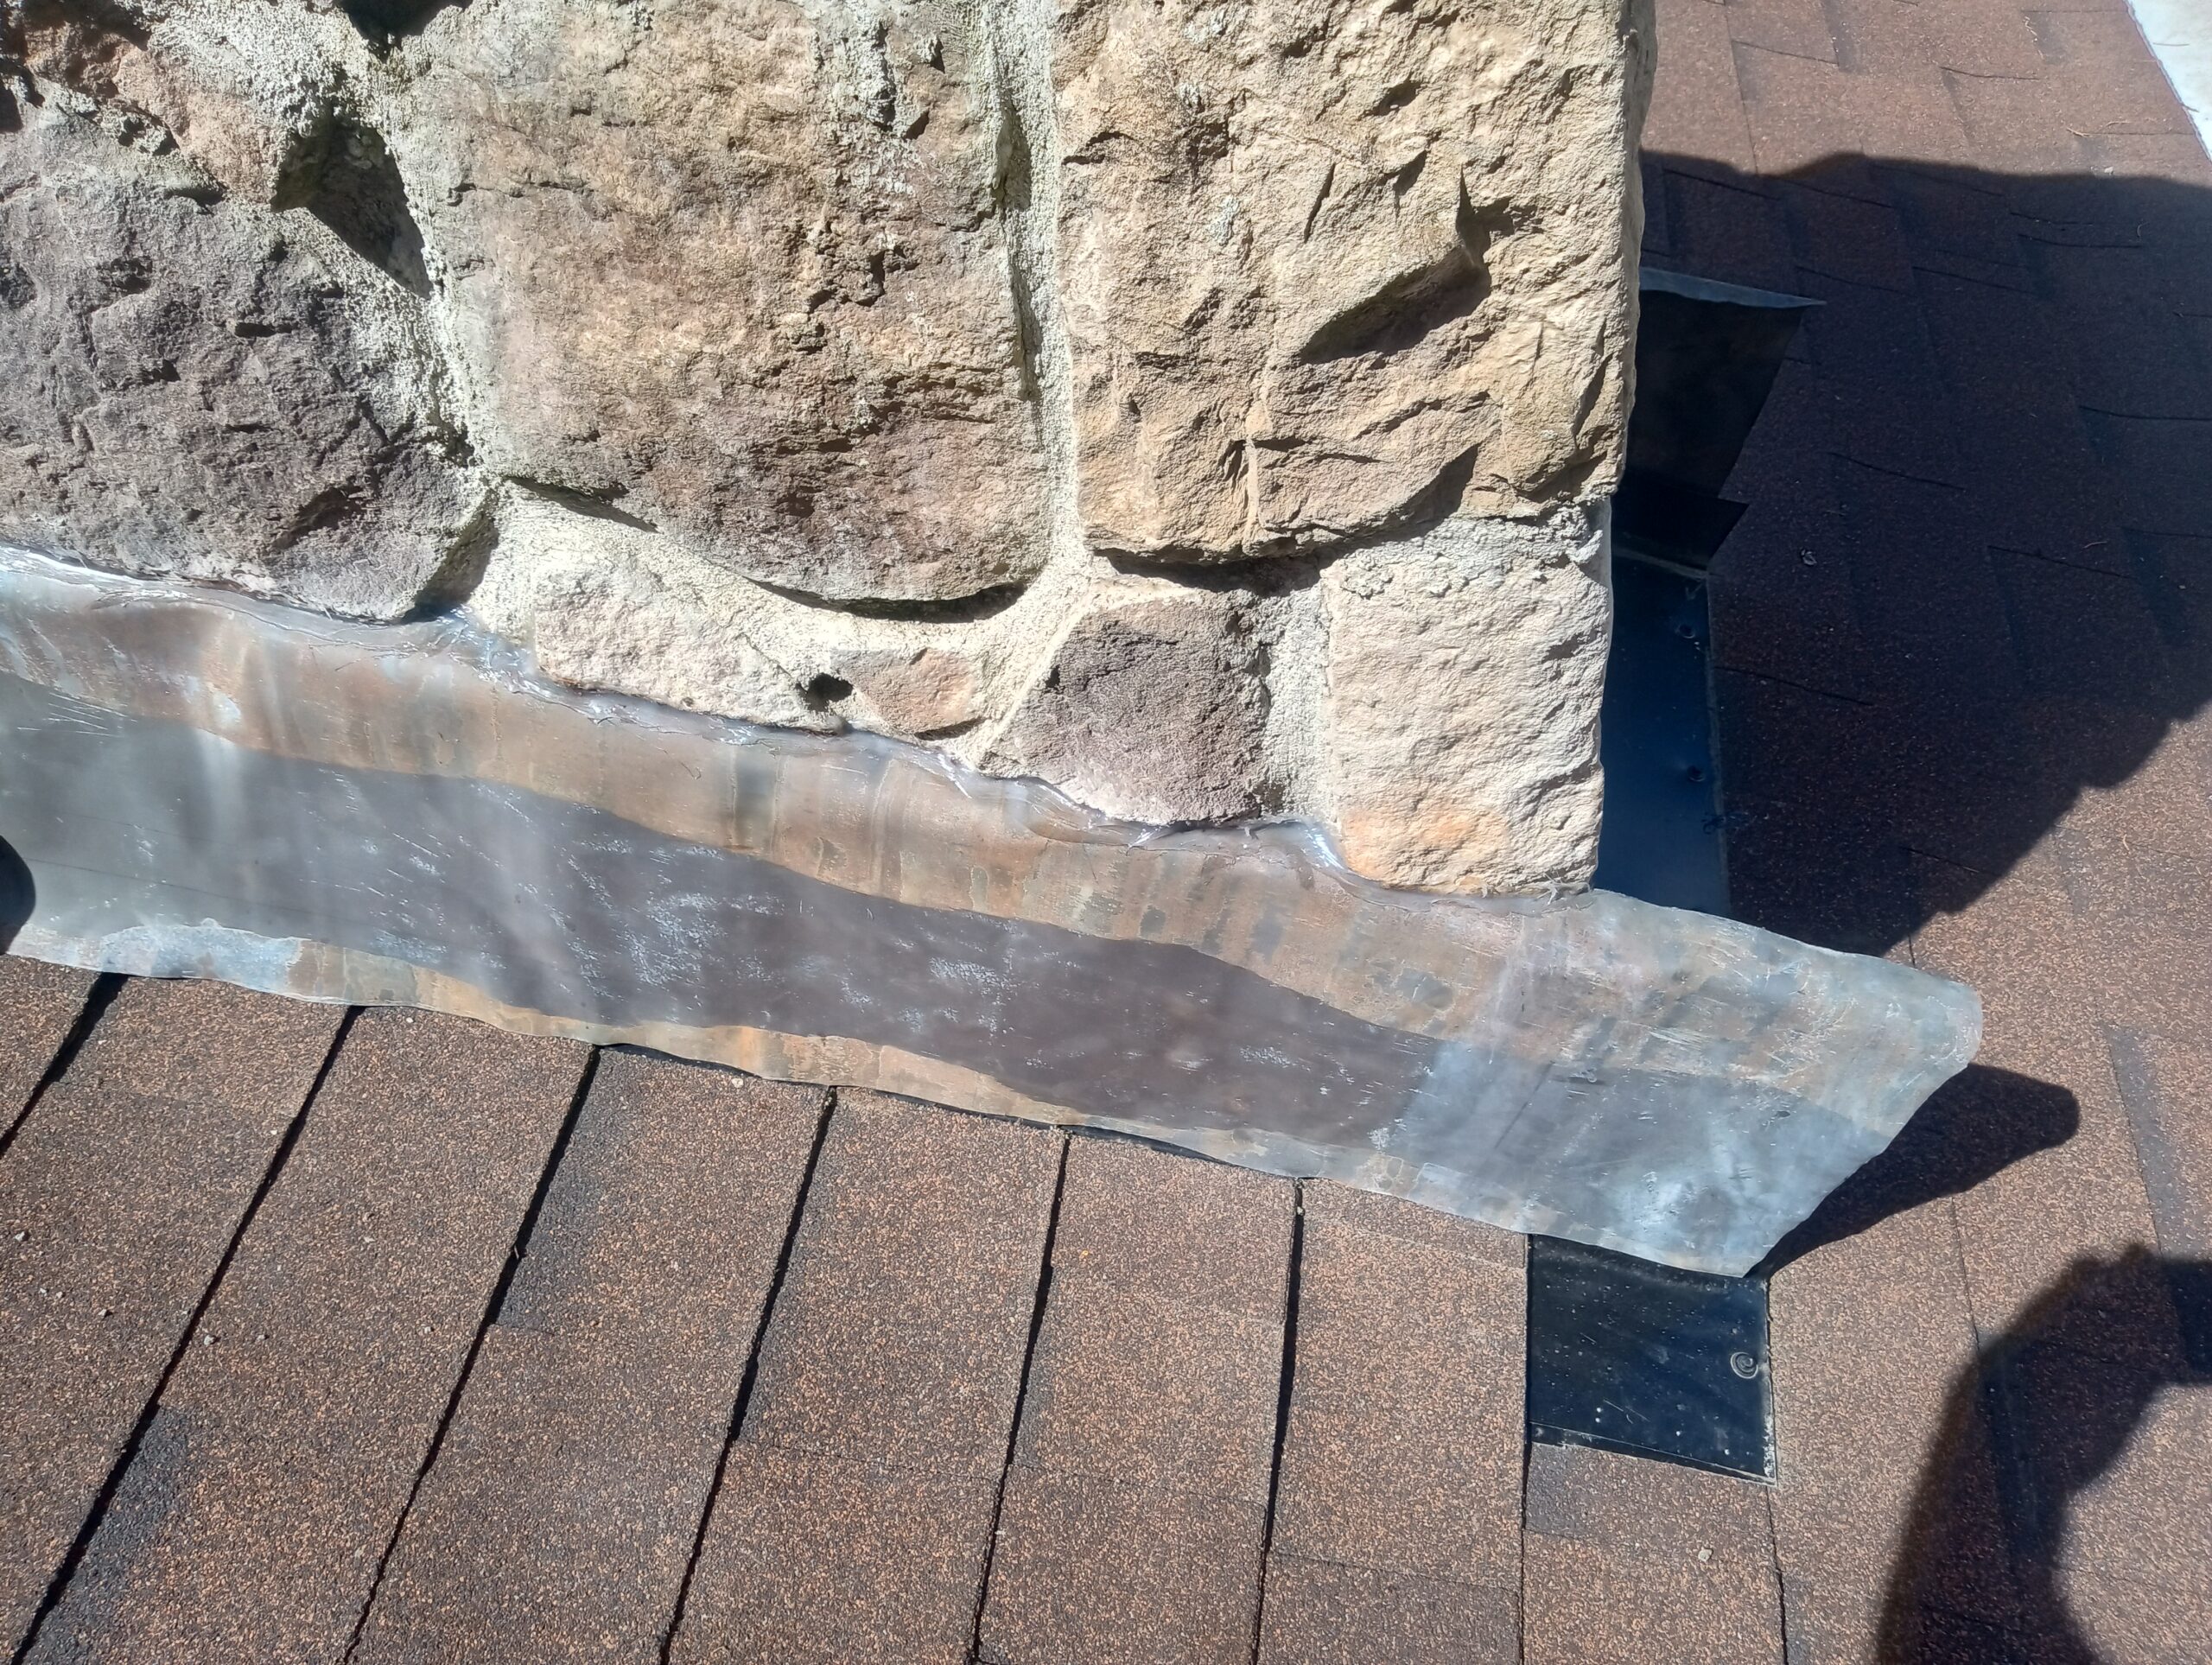
Lead chimney flashing now overlaps the roof flashing.
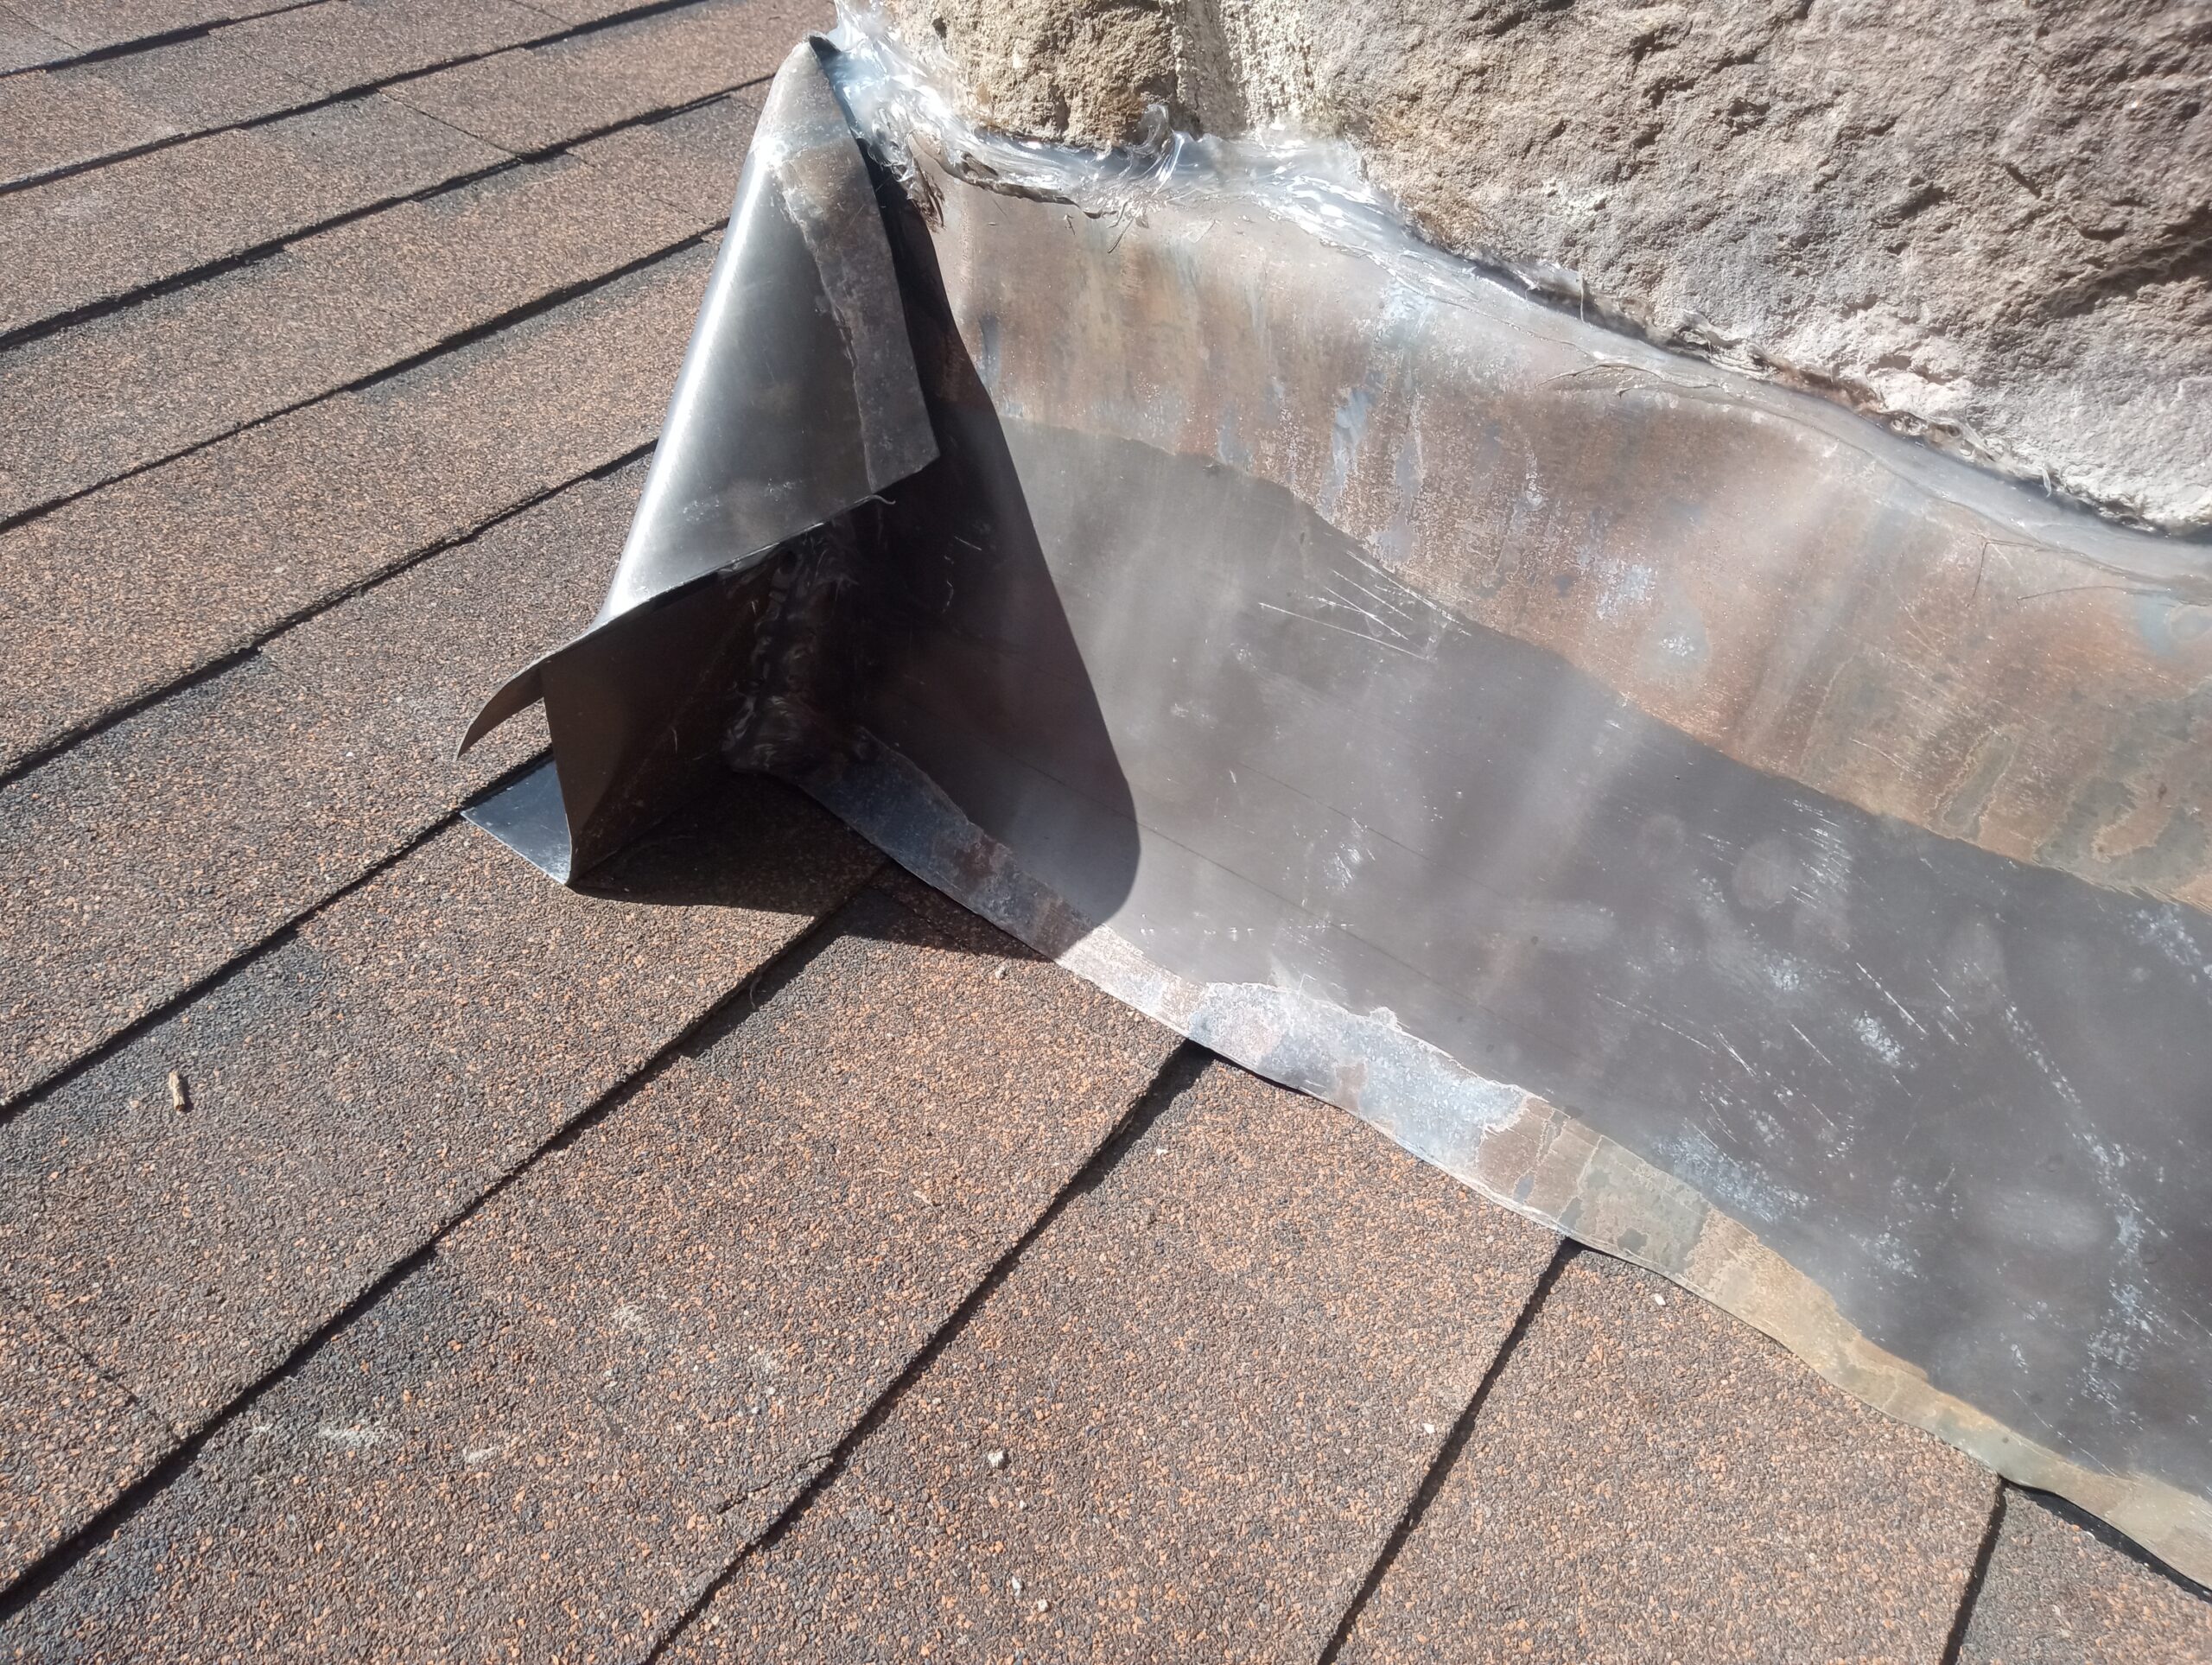
Intersection of front and side chimney flashings.
Why Lead Flashing?
In the case of a chimney built with stone, lead flashing is used because it is easily shaped, wrapped and contoured.
A tuck-point repair is done, as mentioned above, to a chimney that has mortar joints which are compromised in some way but have not completely rotted away. The cut-off point for this sort of repair is between 3/8 inches and 1/2 inch of deterioration and also requires the brick to still be intact. If either of these requirements is not met then a rebuild of the section(s) or chimney in question may be needed. To see a 9-minute video showing this entire process, Click here
When the above points are confirmed the damaged mortar joints have to be removed using a grinder and a diamond grinding blade that will grind any damaged mortar out of the joint. The joints are ground out to the point where the mortar no longer grinds away easily, and then these joints are cleaned out. This removes the deteriorated mortar and allows for new mortar to be inserted.
After the grinding and cleaning are done the new mortar is prepared. This is done using mortar, water, bonding agent, and any coloring agent needed to match the existing mortar. The bonding agent is key here as it ensures a superior bond between the old mortar and the new mortar, as well as the new mortar and the brick. This will greatly enhance the life of the chimney. The mortar must be prepared in a way that it can be easily applied and shaped during the mortar application process.
We spray water on the area to be pointed, which will clear out debris and grinding dust, thus allowing the new mortar to gain purchase on the brick and the old mortar. This is done in stages to ensure that the areas do not dry out. Immediately following this we can begin the process of pointing, or applying the mortar to the prepared joints.


The new mortar is then allowed to set up for a few minutes which will give it the firmness needed for the final tooling process.
The last tooling/smoothing process is called striking the joint. This is done using a convex striking tool to add an inward groove to the joint. This feature not only looks good but also increases the life of the chimney by affecting the angle that rain or snow strikes the joint. The excess mortar is trimmed from the mortar joint, then the repair is allowed to cure for about a day, after which the chimney is acid-washed to remove mortar residue from the outside face. The pictures below are of the finished repair before the acid washing process.
This is the end of this repair, but at Willamette Chimney we have one additional step: thirty days after the repair is finished we return to the job and apply a waterproofing chemical called siloxane to the chimney. This chemical allows moisture to exit the chimney but prevents it from entering. This step also extends the life of the chimney.


Call Us For Your Repair Project
Email (Send photos!) –
chimneyhelp@yamhillcountychimney.com